INTERNATIONAL-MODS: E^5BOOSTER, enhance your pinpointer performances with a simple click!
Foreword by Leonardo/”Bodhi3″
As announced some days ago (LINK) , Sergio/”Xergix”, AMDTT senior member and electronic expert, just sent me his article on the E^5Booster (read it ‘E to the 5th Power’ Booster) project. I’m so happy Sergio decided to share his intelligent idea with all the blog readers who, I have no doubts, will really appreciate his work. I want to thank Sergio again for his excellent work and also I would like to thank Mauro/”Mauroki” for the extra photos and bench and field tests of the prototypes Have a nice reading!
Leonardo/”Bodhi3″
AMD Tech Team Director
—————–
MODS: Project E^5Booster to enhance handheld pinpointer performance.
Project and Article by Sergio/”Xergix”. (c) 2014 for AMDTT
Extra photos and tests by Mauro/”Mauroki”
1. Introduction

Its a well known “trick”, in the detecting scene, that moving a small coin or any other small metal object closer to the base of the probe (Note by Bodhi3: the probe is something like an antenna, and it’s the sensitive part of the pinpointer) of any handheld pinpointer, you will have a sort of performance boost, in detecting distance/depth, on inspected buried targets. You will easily find some videos on Youtube about this trick and I will give you some links in the ending appendix to this article.
From the electronics point of view, the explanation is quite easy: the little coin just “tunes” the probe that fundamentally is a coil with a ferrite core inside. As well as with old radios that could be tuned by manipulating a coil with a ferromagnetic core (ferrite), the pinpointer probe can be “tuned” by placing a piece of metal at the coils end, gaining sensitivity.
Leonardo/”Bodhi3” Tech Note
By placing a ferromagnetic core inside a coil, the emitted electromagnetic field will be amplified. This is due to the increased electric inductance, since it is proportional not only to the coil windings number but also to the ferrite core magnetic permeability that is much greater than the one measured with air core.
 In this formula we can see how inductance “L” is proportional to the windings number “N”, to the nucleus area “A”, to its length “l” and the forementioned core magnetic permeability (greek letter Mu). In simple words, the iron core increases the electric inductance that will produce a more intense electromagnetic field.
2. How E^5Booster works?
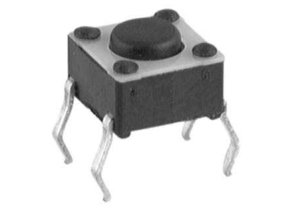
The E^5Booster essentially is a virtual small coin but, compared to this one, has the great advantage it can be “activated” by just pressing a small button without the need of moving it. This will allow to easily fix it on the pinpointer in a stable way without any mechanical moving parts. Fundamentally the E^5Booster is just a coil and a mini button that closes the circuit when pressed. Let’s try to explain the technical difference between the “coin-trick” and the “coil-with-a-button” booster. From an electronics point of view, a coin is essentially comparable to a closed coil and could strongly interfere with a LC circuit (L=Inductance, C=Capacitance) as the pinpointer probe, in the same way a ring could do. You can use a common ring instead of a coin and the result will be the same: if the coil is “open” (read “interrupted”) won’t interfere with the probe, but if we shortcircuit it with a switch button, we will transform the coil in a sort of ring that could be compared to a coin. Easy, isn’t it?
3. Let’s do it!
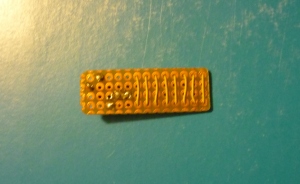
Everything we need to produce an E^5Booster is a coil and a switch button: the more convenient coil shape is the planar one, since it can be easily adapted to any surface, rounded as Garrett’s Propointer, Minelab’s ProFinder, White’s TRX or flat ones as with DTS Sherlock or White’s Bullseye II. The switch button should be as small as possible and I suggest to use a 0,25 mm electric wire to produce the coil. It could be varnished or insulated. The coil I’ve made has 5 windings but the number is not critical. In the first prototypes (see photos) I used a small matrix board but it wasn’t flexible enough to be applied to the pinpointer in the right way.
So I had the idea to use something flexible and I’ve placed the coil and the switch button on a floppy plastic strip taken from a blister envelope. But I wasn’t satisfied enough. So I’ve transfered the circuit on a self-adhesive neoprene strip and the result is a flexible E^5Booster that could be easily applied on any pinpointer.
4. Let’s take a look at it


5. How to apply the E^Booster to your pinpointer
Applying the Booster is very easy: you just need to place it on the base of the probe when the pinpointer is turned on. Then you slowly move it along the probe (toward its tip) keeping the switch button pressed until the pinpointer will start to beep. Then you just slightly move it back until the pinpointer beep won’t stop. That is the correct position!
You can now fix it with an adhesive tape (just the coil area, leave the miniswitch uncovered).
The E^5Booster, when the switch button is pressed, will almost allow to double the pinpointer sensitivity. I’ve, together with many friends, have done many tests on different models having really brilliant performances. Obviously, if you have a cheap pinpointer that can only detect things that are very very close (some cannot detect coins over 1 cm away!) the E^5Booster will maybe allow you to extend the sensitivity to 2 cm, but on good models that are able to detect a coin 3-4 cm away, the results will be amazing!
And think about it… No batteries…No special electronics…and soooo cheap and easy to be made!
Addendum by Mauro/”Mauroki”

Yesterday, during a hunt with my Spectra V3i, I had the chance to test the E^5Booster on the field on my Propointer. Its intuitive and easy use will enhance the already great performance of the Garrett pinpointer. You just need to press the mini-switch to detect targets at greater depths well over the original capability.
PRO: E^5Booster will almost double your pinpointer performance
CONS: If not correcty fixed or protected from moisture and mud, this tiny circuit could be easily lost or have some malfunctions.
I think the perfect solutions could be, and I know that Sergio is already working at it, to have the E^5Booster in a neoprene ring that could be fitted around the Propointer, with a well protected and waterproofed mini-switch. Mmmm… I think manufacturers should work on it. Don’t you agree?
[youtube http://www.youtube.com/watch?v=_N6F7GtsMjs&w=420&h=315]
APPENDIX
Some international videos on the pinpointer “trick”: https://www.youtube.com/watch?v=X0tpCEEcNHE https://www.youtube.com/watch?v=5NwKFql01Wg
made my variation on the theme see DVVL Belgium
http://detectorvrienden-vlaanderen.be/nforum/viewtopic.php?f=116&t=44960&p=291826#p291826
Regards
Dirk
We wanted to avoid a mechanical solution so we aimed to produce a simple but effective electrical circuit that could allow the operator not to move anything…
And we succeeded… 😀
Anyway good job Dirk!
Leonardo/”Bodhi3″